|
Making, Sewing Renaissance Clothing - Garb -Cloaks - Dresses and more
Where does one find the "old time clothing"? Many people make their own. You can use modern day patterns made from the look of the Renaissance and or Medieval times, directions for simple clothing on the Internet or using modern day, tweaked a bit patterns.
HOW TO MAKE AN EASY TO SEW MEDIEVAL SKIRT 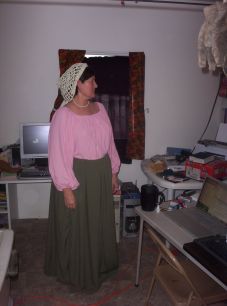
If you can sew at all you can certainly make a "Ren" Skirt. Buy enough fabric, usually a solid color, to go from your waist to the floor twice plus about 3" or a little more. In other words, measure from your waist to the floor, add three inches to that number and buy fabric that long, times two. You are going to cut the fabric in half and sew a seam down either side to give the Skirt a full look.
At your home fold the fabric from end to end and cut the fabric in half. Open the fabric to the full size and sew the two sides together, longways. Place a seam at the bottom all the way around. Sew the top so that the waist band seam will allow a safety pin through, usually with a 1" or 1 1/2" seam. Do not sew the seam down in total. Leave about 1" open. Take a piece of elastic (or ribbon, but untied, the ribbon can get away from you and you will have to start over with another piece of ribbon) Cut elastic just a bit shorter then the size of your waist, approx. 3" shorter then your waist, cut ribbon longer than your waist with another 15" for tying. Run the elastic through the waist using a safety pin on one end so that you can push the elastic through the waist band all the way around. HOLD THE FAR END OF THE ELASTIC (or ribbon) SO THAT IT DOES NOT PULL INTO THE SKIRT, LOOSING THE ENDS YOU WANT TO SEW TOGETHER. When you pull the first end of the elastic out through the opening in the seam, sew the two ends of the elastic together, and really nail it with at least four times back and fourth. Or you can use a long piece of thin ribbon for your gathering piece and tie it each time you put it on and take it off (if you do not keep it tied, the ribbon will slip through and will need to be regathered. There you go, you have a long, full Renaissance/Medieval Skirt.
Peasant Shirt patterns are not hard to find. You can find them used at garage sales, thrift stores or perhaps even in your mother's or a friend's pattern collection. Peasant Shirt patterns are easy to follow and easy to tweak for sizing. If you find a pattern for a Peasant Shirt that is too big for you or one too small, just tweak the pattern a bit. The fit is not tailored so it is easy to do.
Look at the photo above. I made that Shirt with a Simple 'Modern' Pattern I bought at a Garage Sale for .25.
You can also make a dress with the same pattern, by adding length....be sure you cut the skirt out to a flare as you add the length. Or. You could use a Dress Pattern to make a Shirt....just tuck up and fold under the bottom of the dress and cut to the size/length, shirt you want.

There is a way to make a Renaissance/Medieval Cloak that anyone that can sew a straight stitch can make in a short time.
You will need 5 yards of fabric and a pattern for an oversize hood.
Any Hood Pattern will do. You can tweak a regular sized hood pattern to the oversize hood you are looking for. Again, check your pattern collection for a hood pattern that might come with a jacket, a sweatshirt or the like. These will work fine, just over-cut them so that they are larger then modern day hoods.
Make your Hood. Then to the bottom of it, add more fabric, about 5 yards, tucked and gathered up evenly.
If you are lining your Cloak you could do this two ways. One, make a Cloak and a Cloak liner, so the two together, right sides together and leaving an opening at the bottom for turning...
Or, Sew your liner to your Hood, then Sew your liner to your Bottom Cloak. This way will show a seam at the neck.

Tunics are so simple to make! They will also cover a lot to bring a Medieval Custom together.
Chose your fabric. For Summer Fairs, choose something light weight to stay cool, in the Winter, you might want a heavier fabric.
Measure your size, again, but measuring from your shoulder down to where you want your Tunic to end. Add 3".
Open your fabric out and lay it on the table. Measure your fabric before you do any cutting.
Fold your front in half and very carefully, cutting less than you think you need, cut out the scoop for the neck. REMEMBER, YOU CAN ALWAYS CUT MORE, BUT YOU CAN NOT PUT BACK WHAT YOU CUT OUT.
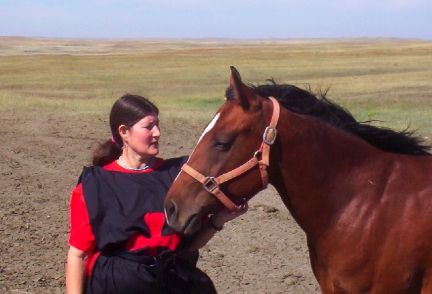
If you want an emblem on your tunic, you can use Wonder Under and use any fabric to cut this out, and add it on the front of your Tunic before sewing up the seams.
You can cut a collar piece to sew and tuck down or just turn your seams down a bit and sew a seam.
Sew your sides up each end to end. (not together, they are left open and tied shut with a belt or sash) and sew the hem.....and you are finished.
BABY AND CHILDREN'S CLOTHING 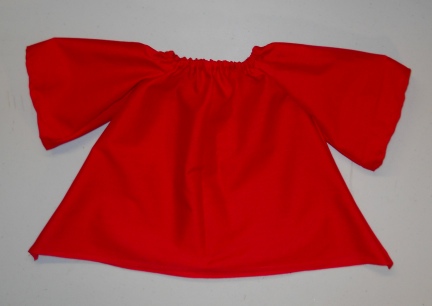 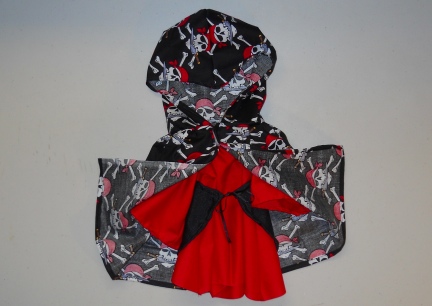
If you are experienced at sewing, you will not need a photo for baby and children's Renaissance Clothing or Garb.
more ideas and information coming
{HORSE/EQUINE PATTERNS BELOW}
PATTERNS AND WHERE TO FIND THEM IN TODAY'S WORLD 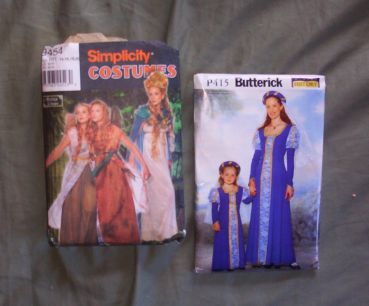
When at Garage Sales and or Thrift Shops have a look in the pattern bin. You might be surprised to find not only costume for Renaissance times but also wedding dresses made with the Medieval look that can be used and tweaked for lovely Renaissance Dresses.
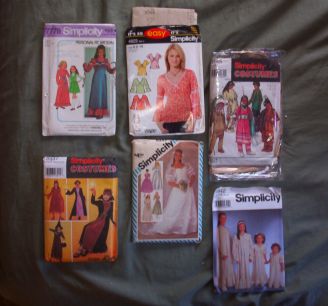
Keep in mind that some of these patterns are so detailed, that for some people it will take longer to make the clothing, with the patterns, than the time they will spend at the Renaissance Fair.
Some of the fun for many folks will be making the items they will wear to the Fairs. For others, they just want to have fun and save money.... measure this out when you look at the patterns for Ren Wear.
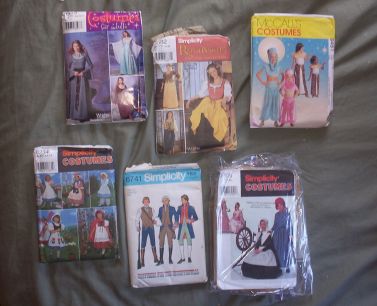
Halloween is a GREAT time to look for patterns in Sewing/Fabric Stores and Sewing Dept in Stores. Just be careful. Sometimes the Patterns can cost MORE than buying an outfit on line, or in a Halloween Store.
HORSE/EQUINE RENAISSANCE GARB (jousting) 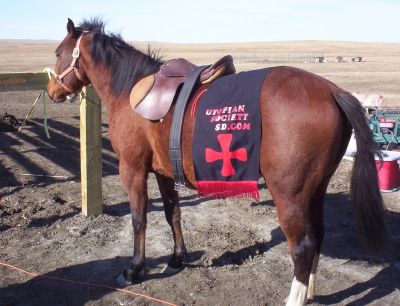
I am betting you enjoy seeing the horses all garbed up in Medieval Bards, Barding, Caparisons, Hoods, Serapies and such as much as I do. There is just something wonderful about it all. Some would call it Romantic.
If you own a Horse and are looking for something easy to put on it to look Medieval....here's an idea for you.....but first...
I am always amazed how many people think that a horse, any horse, can be used for jousting... Not just any horse, but any horse at any moment, with no additional training, they believe, can be garbed up, mounted in flowing clothing and headed at a full gallop while the rider carries things such as swords and or jousting lances.
If you are planning on riding a horse in Renaissance Garb and or Jousting, you will need to desensitize the animal to the flowing, blowing, clothing first. It may take a long time with some horses and some may never get used to the idea of the monster you are wearing to be on it's back. As many good animal trainers say "Take the time it takes." Start slow and off away from the horse with the large flowing garb. Work up closer to the horse as the horse allows.
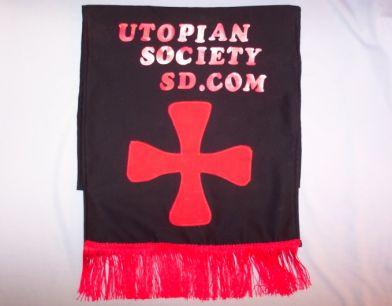
This Serapes is so easy to make. Measure your Horse behind the saddle from end to end as long as you want your Serape to be...then add about 2" to that figure and purchase your fabric.
You will need to purchase fabric, the trim for each end, and fabric and Wonder Under for your Emblem (if you want to add an Emblem). Wonder Under will also work for letters if you want to write something on your Equine's Serapie. You will also need two pieces of cord or leather strips about 15" long each for tying onto your saddle.
If you look at the photos here, I am sure you can figure out how to make this item. It is very simple.
Add your Seams all the way around before adding your trim or emblems.
Take your Seropie out to your horse, and try it on with the saddle. Mark your Serapie where you want to place the cords for tying, make sure they will lay correctly in the correct area before sewing them unto the fabric.
This type of Horse Garb or Serapie is good for Parades. So add this page for Making Your Own Parade Horse Gear.
FUN TOYS FOR GIRLS OR BOYS! 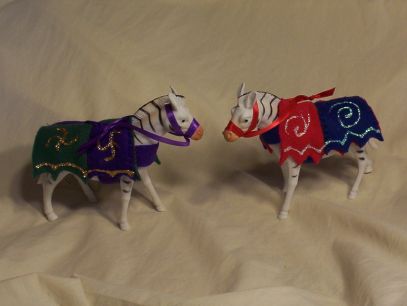
I made these Jousting Horses for a friend of ours son for Christmas one year. Super easy. Just lay a small piece of fabric over your model horse and cut. If you want two colors, square the pieces off and stitch or glue them together. Decorate the way you want, I used Glitter Glue. And then cut a small piece for the neck, sew or glue. Let the glue dry between steps of course...
The contents of this page for Garb / Clothing and Such is still under construction. Please check back later!
| 


 In the high plains of South Dakota, USA
 In the high plains of South Dakota, USA